45 Skies - 3docean update!

UPDATE: My HDR Sky shop is now open, please buy my products there instead, thanks!

Before I start making new skies, I decided to go back and work a bit more on all the old ones. If you bought any of them, you can now log in to 3docean.net and download the updated versions.

Changes include:

  • The original horizon has been removed from the HDR files, and the photos used to make the HDRi re-processed for a smoother, noise free image.
  • Radiance (.hdr) and OpenEXR (.exr) file sizes have been optimized to improve loading times.
  • 16 bit RAW versions of the backplate photos now included to allow greater freedom in post processing.

Enjoy!

EDIT: labelled version as requested.

EDIT 2: Any new skies won't be happening anytime soon I'm afraid, I'll probably wait till I have 9 ready so that I can offer them as a pack for a reduced price straight away.

EDIT 3: Lots of people asking how to get the updated skies. Just log into 3docean as normal, click on the downloads tab and you will see all the products you have bought from 3docean, then just download the ones you want. All my skies on 3docean have been updated so you will get the new version when you download.

Mot Renders and a mini c4d tutorial

house-roces-fog-cam-1

house-roces-fog-cam-1

house-roces-fog-cam-2

house-roces-fog-cam-2

house-roces-fog-cam-3

house-roces-fog-cam-3

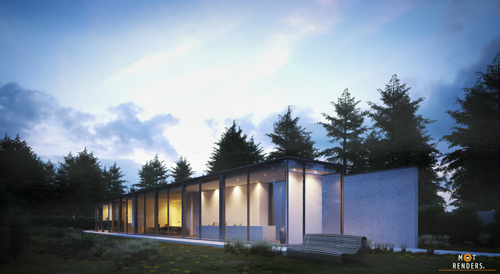
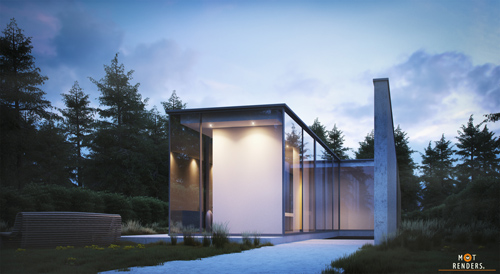
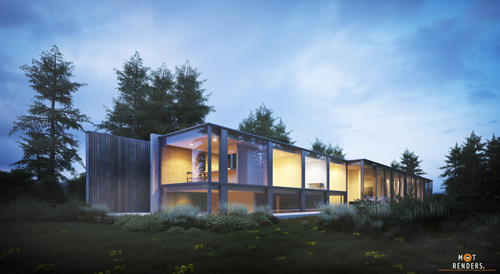
Some more nice new work in my inbox this morning, this time from Mouton Burger (Mot Renders). What is a little bit different with this work, is that it was done using Cinema 4D. Good to see that my HDRi skies work just as well in c4d as they do in other packages.

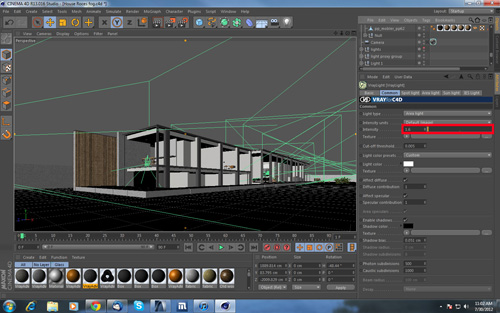
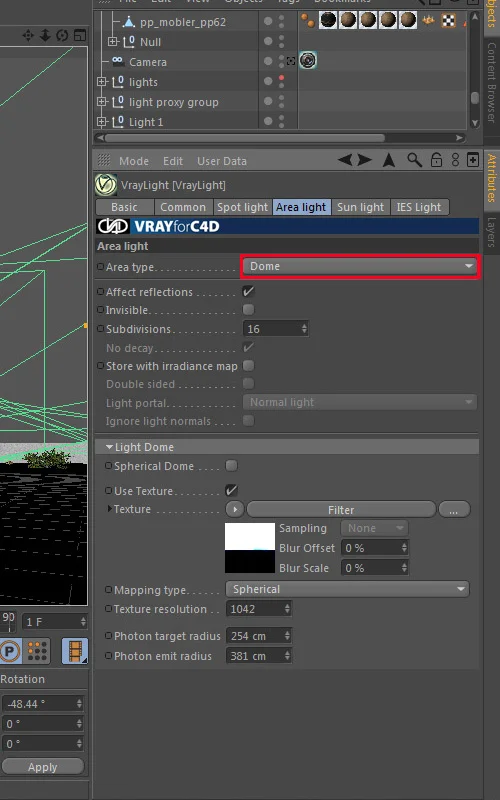
The sky Mouton used was "1941 Dusk Blue", and here is a guide to using HDRi skies in cinema4d together with vray:

untitled-2_500

untitled-2_500

General: In c4d project settings, LWF should be disabled and the color profile set to sRGB Vray Color Mapping: Check the LWF tickbox and set the gamma to 2.2

1. Create cinema 4d arealight 2. Add vraylight tag to it

b

b

3. set the intensity to 1.6

c

c

4. Go to Area light tab and set the Area type to Dome

a

a

5. Add your Sky hdri in the texture slot and set the color Profile to sRGB

6. Insert the hdri in a Filter shader and set the gamma to 1.0 (or 0.75 if you wan't to boost the strength of the sun like this tutorial) 7. Add a vrayphysicalcamera tag to your camera in order to control exposure, depth of field etc.

rendering OOF* highlights

clamp-comparison2

clamp-comparison2

Just a quick comparison between rendering the quick way (A) and the sloooooooooow way (B). Guess which method I always use?

A: In vray's color mapping section, Sub-pixel mapping is ticked, as is Clamp output (set to a value of 1.0).

B: Both Sub-pixel mapping and Clamp output unticked.

Even if you aren't trying to get this particular lens effect, I still recommend rendering unclamped for trees (and many other situations), it just looks so much more realistic. When I get a chance, I'll render the same scene without DOF to show you the difference.

EDIT:

clamp-comparison31

clamp-comparison31

C: clamped, and sub-pixel mapping ON D: unclamped, sub-pixel mapping OFF

Even without DOF, I think it trees still look much more realistic when rendered unclamped.

* out of focus

Lighting test by Saiful Said

Saiful Said sent me a nice selection of images, one of which features my 1934 sky. Love the warmth of the direct sun contrasted with the cool skylight. You can read more about it and see the rest of the images on Ronen's blog.

minimalist test - dusk

minimalist test - dusk

ArchitecturePasteBook

archpastebook

archpastebook

Looking for inspiration? May I suggest having a look at ArchitecturePasteBook curated by Andy Matthews (photographer, architect). I for one am thankful for the work he puts into it as it saves me a LOT of time trawling round the blogs! (and it seems we have a very similar idea of what's good and what's not so good)

Hardware FAQ

I get so many questions about what hardware I use that I decided to write a short blog entry that I can direct people to rather than giving them Steve Jobs style minimal answers.

I use a Mac Pro as my main machine, and currently have 2 intel i7-980x based render slaves. The Mac Pro is about 5 years old and boots directly into windows, in fact I can't even boot into osx anymore as I stuck a non osx verified graphics card in it. Bootcamp works perfectly with windows. Essentially all bootcamp is anyway is a set of drivers for the graphics card, audio, bluetooth, wifi, lan etc.

After 5 years of working for myself I have come to the conclusion that what is most valuable to me in my main workstation is reliability. My ageing Mac Pro has been incredible in this regard and if I replace it I'll probably go for a similar type of machine. So even though it might be better value for money to get a couple of i7 machines and overclock them, I would prefer to go the non-overclocked xeon route, with lots of ECC ram. Having your own mini render farm is great, but often for quick test renders what you really want is a very powerful main machine. Thats my preference anyway.

If you are on a budget then of course a single processor machine will be a better bet, especially as you can stuff them full of ram these days. I'm not very up to date on what the latest and greatest is in cpu technology and even less so when it comes to graphics cards. The best I can do is send you over to 3datstech.com as Andy Lynn's amazon lists are pretty handy and fairly up to date.

Hendee-Borg house interiors

This is just a quick run down of various aspects of this project. I am planning a more in depth article where I can go into more detail.

Lighting:

Like most of my recent projects, this one is lit with just one HDR sky (1735) and no vraysun/sky system. I have a short tutorial here which shows the basic steps.

I used a different lighting set-up for the interiors as I preferred how the interiors looked with direct sunlight. The warm sunlight helped to emphasize the warm tones of the living area, and the blueish skylight on the other side of the house did the opposite.

Furniture:

Most of the books come from Bertrand Benoit or model+model and supplemented by some books I found on turbosquid by 'temp64GTX'. Sadly I finished placing all the books by hand just before model+model released their latest collection of books and handy looking bookmanager script!

View the full set of images on Flickr.

Hendee-Borg house exteriors

A new collaboration with architect William O'Brien Jr. that I am proud to be able to share here. (Information about the house will be available soon on the architect's website).

You can view a slideshow of the complete set of exteriors (7 images) here.

Technical info:

I used sketchup as usual to model the house itself, and then imported everything into 3dsmax to set up the scene. Vray for 3dsmax was used to do all rendering, Forest Pro for the landscaping and the trees were placed with the help of the advanced painter script. I used Brix (now called Mighty Tiles, you can buy it via Ronen Bekerman or alternatively here) for some of the materials, and also Thomas Suurland's Multitexture map (cg-source.com) for the shingles.

The HDR sky I used for the exteriors was 1941.

Landscape elements:

- I used (and tweaked) some grass models by Bertrand Benoit - Various trees by 3D Mentor - HQ Plants 2 - Cedar of Lebanon tree by Xfrog - The gravel was just four individual stones modelled quickly in 3dsmax and scattered with Forest Pro (with random colours)

I'm going to do a more extensive blog post talking about the development of the look and feel of these visuals as well as going into technical aspects in more detail. If there is anything you would like me to focus on please let me know!

Lake Lugano House by James Pickford

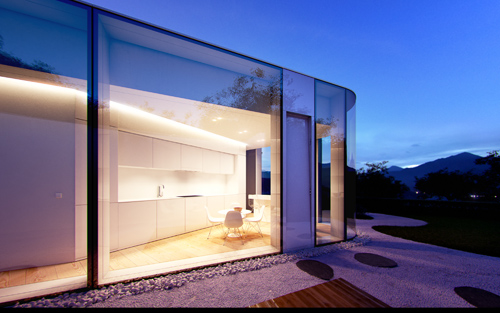
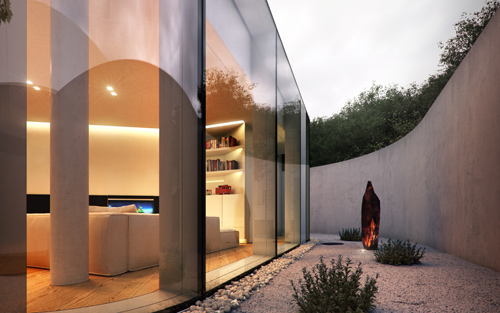
I loved these images by James Pickford even before I learned he had used my skies to light them. The dusk ones are absolutely spot on in terms of lighting and colour balance. James works for the excellent Uniform in Liverpool and did these as a personal project. They are based on the Lake Lugano House by JM Architecture in Italy. You could easily sneak the dusk images in amongst the photographs on the architect's website and no-one would notice.

He used 1957 for the dusk images and 1008 for the overcast one.

lake-lugano-shot_06_500

lake-lugano-shot_06_500

lake-lugano-shot_07_500

lake-lugano-shot_07_500

lake-lugano-shot_01_500

lake-lugano-shot_01_500