Hendee-Borg house interiors

This is just a quick run down of various aspects of this project. I am planning a more in depth article where I can go into more detail.

Lighting:

Like most of my recent projects, this one is lit with just one HDR sky (1735) and no vraysun/sky system. I have a short tutorial here which shows the basic steps.

I used a different lighting set-up for the interiors as I preferred how the interiors looked with direct sunlight. The warm sunlight helped to emphasize the warm tones of the living area, and the blueish skylight on the other side of the house did the opposite.

Furniture:

Most of the books come from Bertrand Benoit or model+model and supplemented by some books I found on turbosquid by 'temp64GTX'. Sadly I finished placing all the books by hand just before model+model released their latest collection of books and handy looking bookmanager script!

View the full set of images on Flickr.

Hendee-Borg house exteriors

A new collaboration with architect William O'Brien Jr. that I am proud to be able to share here. (Information about the house will be available soon on the architect's website).

You can view a slideshow of the complete set of exteriors (7 images) here.

Technical info:

I used sketchup as usual to model the house itself, and then imported everything into 3dsmax to set up the scene. Vray for 3dsmax was used to do all rendering, Forest Pro for the landscaping and the trees were placed with the help of the advanced painter script. I used Brix (now called Mighty Tiles, you can buy it via Ronen Bekerman or alternatively here) for some of the materials, and also Thomas Suurland's Multitexture map (cg-source.com) for the shingles.

The HDR sky I used for the exteriors was 1941.

Landscape elements:

- I used (and tweaked) some grass models by Bertrand Benoit - Various trees by 3D Mentor - HQ Plants 2 - Cedar of Lebanon tree by Xfrog - The gravel was just four individual stones modelled quickly in 3dsmax and scattered with Forest Pro (with random colours)

I'm going to do a more extensive blog post talking about the development of the look and feel of these visuals as well as going into technical aspects in more detail. If there is anything you would like me to focus on please let me know!

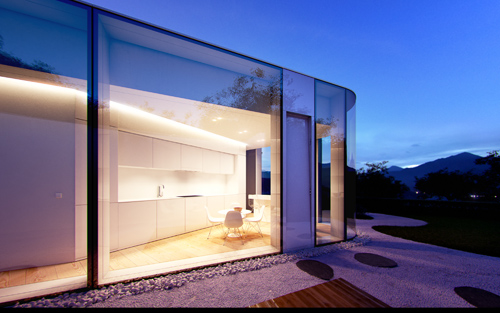
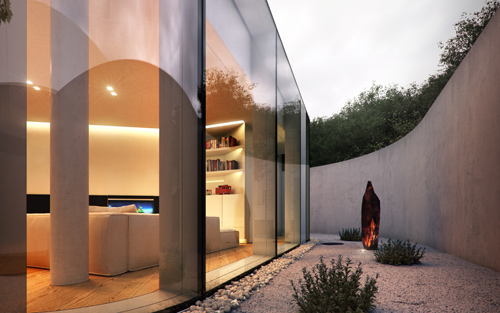
Lake Lugano House by James Pickford

I loved these images by James Pickford even before I learned he had used my skies to light them. The dusk ones are absolutely spot on in terms of lighting and colour balance. James works for the excellent Uniform in Liverpool and did these as a personal project. They are based on the Lake Lugano House by JM Architecture in Italy. You could easily sneak the dusk images in amongst the photographs on the architect's website and no-one would notice.

He used 1957 for the dusk images and 1008 for the overcast one.

lake-lugano-shot_06_500

lake-lugano-shot_06_500

lake-lugano-shot_07_500

lake-lugano-shot_07_500

lake-lugano-shot_01_500

lake-lugano-shot_01_500

bullfinch visuals

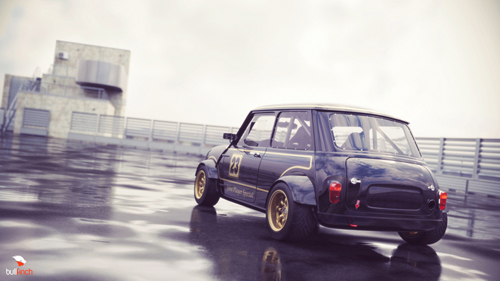
minifinal031

minifinal031

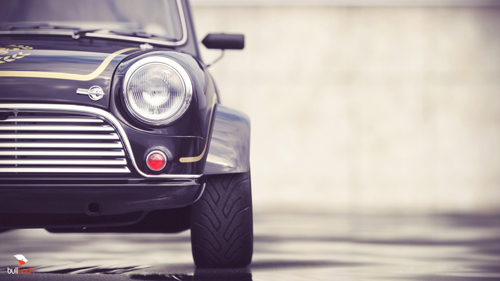
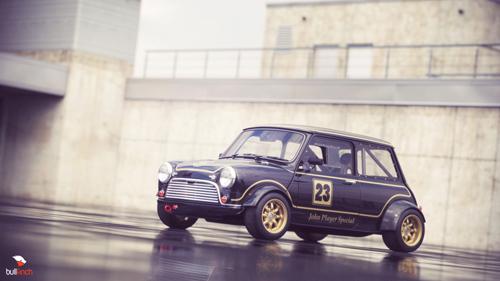
Really interesting to see some non arch viz work being made with the help of my HDR skies! These beautiful renders were sent to me by Andreas Fougner who works in the video game industry and is based in Stockholm, Sweden.

minifinal051

minifinal051

minifinal131

minifinal131

The sky he used was '1342 Cloudy' and you can find the complete set of images on his blog: bullfinch visuals.

Triple-D visuals

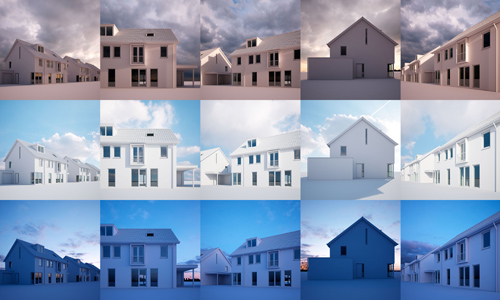
I always enjoy seeing images made using my HDRi skies, so I was delighted to see these lighting tests arrive in my inbox today.

These are from George Nijland (Triple-D Visuals) who was kind enough to let me share them here, and who has been experimenting with the reduced gamma HDRi workflow that I blogged about here.

The skies he used (from top to bottom) are:

0743 Cloudy Morning
1725 Sun Clouds
1954 Dusk

I love the moody morning one, must try to use it more often!

If you have been using my products then I always appreciate an email to show what you have been making, and I might even share them here.

HDRi lighting workflow

Following on from a tip I first saw on Bertrand Benoit's blog , I have now adopted a new method of loading my HDRi skies. Essentially you can increase the apparent strength of the sun (and therefore get stronger shadows) by changing the gamma of the loaded HDRi map.

If you use the vrayHDRi map (which I now prefer as you can adjust the rotation in degress) then it's a simple matter of changing the gamma from 1 to something lower. Through trial and error I have found 0.75 to be a good compromise. Any lower and there is a risk the sky can become too saturated and contrasty. Something between 0.75 and 1 should suit most skies.

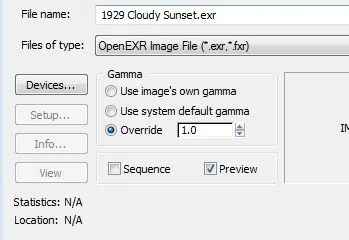
If you use the 3dsmax bitmap loader, you change the gamma of the loaded file as follows (note that you need to enable the gamma/LUT correction in 3dsmax preferences):

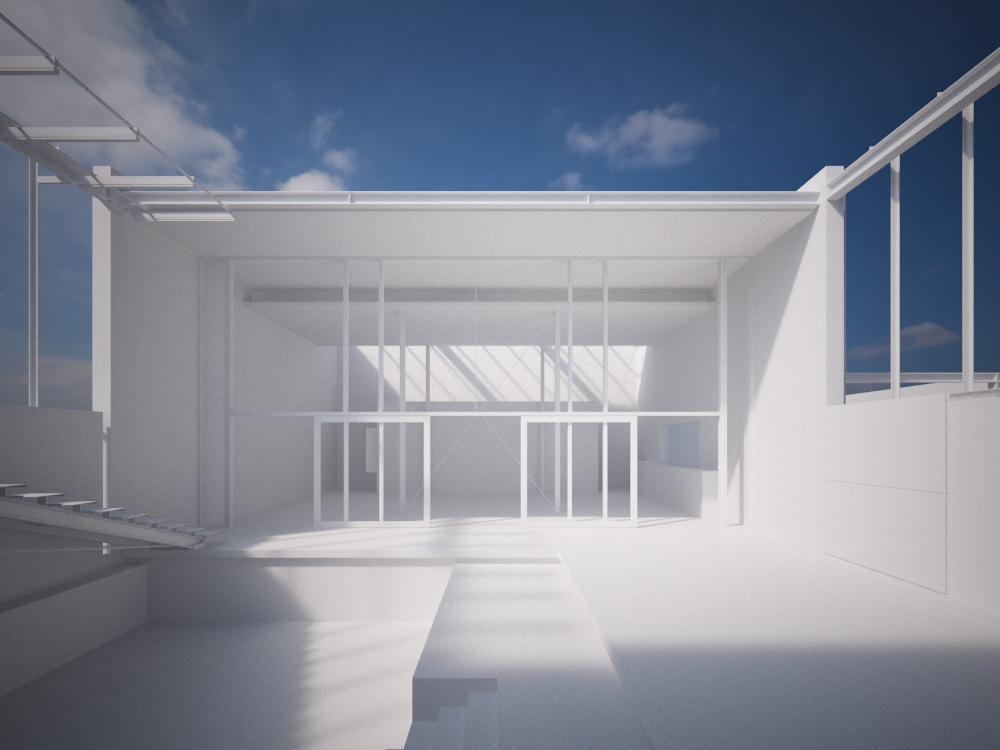
Here is a quick comparison of gamma 1 and gamma 0.75. The main advantage for me is a punchier image, and that you dont need to use a 3dsmax sun in addition to the HDRi sky. All of the products I sell on 3docean have a very high dynamic range compared to most products on the market, so bear in mind you might not get such strong shadows with other HDRi skies.

gamma 1:

gamma 0.75:

Lightroom for Post Production

I really like the workflow in Adobe Lightroom, and often think of a rendered output from 3dsmax as a raw file ready for the final touches. Certain tools in Lightroom just make more sense to me than the equivalent ones in Photoshop: white balance temperature, graduated filters, lens corrections to name a few. With this in mind, it's perhaps not so strange that I often reach for Lightroom instead of Photoshop to do my final post production work. Saving from 3dsmax

I usually save renders as 16 bit png files, so that if I do want to work with the image in Photoshop or Lightroom there is more information to play with. This is an example of a straight render from 3dsmax, I was pretty happy with this result, but on opening it in Lightroom I soon realised I could push it a bit further.

In order to open the 16 bit png in Lightroom, you will first need to open it in Photoshop and save it as a 16 bit psd file.

Straight render from 3dsmax

Colour Temperature/White Balance

This first thing I have tried here is to drag the temp slider up and down and just see what effect it has on the image as a whole. This is a level of control I really miss in photoshop as I just don't find the colour balance tools as intuiative.

Initially, I settled on making the image a bit cooler (-13 on the temp slider).

(click through to flickr for high res)

Checking Contrast & Exposure

This is something i often do in photoshop as well, even if I don't plan to do anything else to the image. It's always a good idea to double check exposure and contrast even if you think you are done with an image. In photoshop I normally just click and drag on a curves adjustment layer. In Lightroom everything you do is non destructive so you can just go ahead and experiment. There are 3 ways of adjusting the tone curve, you can 1. click the direct adjustment tool (or whatever its called) and then click and drag on the image itself. 2. Click and drag on the curves as you would in photoshop 3. Adjust values for highlights, lights, darks and shadows.

Vignetting

Adding vignetting to images works very well in LR, in fact I much prefer it to using the lens correction filter in Photoshop. By leaving the post-crop vignetting tool set to 'Highlight Priority' you get a much more realistic looking vignette (that typically doesnt darken skies too much which is the most common mistake).

Graduated Filters

I use this tool a lot in LR, and occasionally the brush tool as well. By clicking and dragging on your image, you make an area of influence which is essentially just a gradient mask. This mask can then affect exposure, contrast, saturation etc. or a combination of effects.

For this stage, I am simply lowering the exposure of the sky by nearly 1 stop in order to bring some detail/interest back in a sky that was otherwise quite featureless. Here we can really see the advantage of saving a 16 bit image from 3dsmax, if we only had 8 bit data to work with, we wouldnt see so much detail returning.

Additional note: You can experiment with with the brightness slider rather than exposure, it can sometimes give a more pleasing effect.

Final Steps

Once I have got to this stage, and especially after seeing the detail and colour return to the sky, I decided I like the warmth of the original at least in the lower parts of the image. So for my final adjustment, I toned down the colour temp shift from -13 to -6, then I adjusted the graduated filter to boost the contrast and blue colour of the sky.

Below are the 3 images for comparison, the 3rd one being my final choice.

HDRi lighting & glossy reflections

If you are using vray and sometimes find that when using a vray dome light as a light source you get pixelated reflections of the sky, try this:

Select your light and type the following in the MaxScript listener:

$.dome_visibleOriginal=2

That comes from Vlado on the chaosgroup forum, he goes on to explain:

It just controls when the dome texture will be evaluated fully and when the values will be taken from the pre-sampled version specified by the "resolution" parameter. The presampled version is calculated faster, but is jagged. A value of 0 means that the pre-sampled version is used always; a value of 1 means that the presampled version is used for GI and glossy rays, and a value of 2 means that the presampled version is used only for GI rays. 2 should probably be the default, now that we have it.

I have never really noticed it, because the places it might show up (architectural glazing for example) I usually dont use glossy reflections. When I say glossy reflections, I mean any vray material with a glossy reflection value of less than 1.

Here is an example of the problem:

glossy.jpg

and fixed with the secret maxscript code:

glossy_with_fix.jpg

Hope that's useful to someone!


Happy Holidays!

Wishing all readers of this blog a Merry Christmas and a Happy New Year! God Jul och Gott Nytt År.

Thanks for your continued support & comments and I promise I'll try to update things here a bit more often in 2012!

The above image is a bit of a mash up of different things (alpine cabin plywood, 'twins' landscape) with a plywood Christmas tree that I found on build blog.

3ds London December 2011

I've been asked to do a presentation on my work at the last 3ds London event of the year, hosted by Hayes Davidson. Hope to see you there! Wednesday 7th December, from 7pm, at Hayes Davidson's Office.

More info, including how to get there, on the 3ds London blog.